Tuesday, June 25, 2013

After the rain

An unseasonable late June rain has just broken here in the East Bay of California... The plants were rejoicing...

We see much growth happening in the coming days.

Click on photos for high res :)


Tuesday, June 18, 2013

Pallet Table (a.k.a. palatable)

I apologize for the poor pun / word play of the table. I assure you that this is a serious post about making a table from a pallet and will involve no shenanigans or squirrels drinking beer.


In the beginning there was a pallet & no where to sit. 

Nowhere to enjoy a meal.

Nowhere to pry the fruit of its pit.

Only bad poems written with zeal. 


This table was built in the background over a couple of months, you may have (literately) noticed in the background in photos since we began. 

We started with a pallet, a pry bar and an idea. This is our idea of re-purposing.  

It turned out one 4x4 wouldn't hold up the table.

We added 3 more

The last two pictures have our benches in the background :) ...

We built them so the squirrel had somewhere to drink his beer

A wee bit of paint...

Some found foam and purchased vinyl 


Come on over... let's have a BBQ


Saturday, June 15, 2013

Test your soil.

Is your soil alkaline or acidic? If you aren't sure here is a cool ( 9th grade earth science kind of cool ), cost effective and easy way to find out.  

Science Rules


You will need two containers approximately one cup in size
1/2 cup of vinegar
1/2 cup of baking soda
A couple handfuls of your soil. 

Go out in the garden and get yourself a nice fistful of dirt and split in into your two containers. 

In the first container mix in 1/2 cup of white vinegar. In the second container mix 1/2 cup of water ( mix ) and then 1/2 cup of baking soda. 

Product Placement ( I'm waiting for my check )

If container #1 begins to bubble and fizz it is alkaline. 

If you have no reaction turn your observation to container #2. Is it bubbling ? Well, you have acidic soil. 

I observed equally mild reactions placing our soil somewhere in the middle. A nice place to be since we can tilt the soil to the needs of a certain plant. Roses want some acidity... that's easy... just add some coffee grounds and the soil is suited in a couple days. 

Enough about my dirt let's get back to you. If your soil turned out to be acidic you can amend it with  wood ash or lime. If it was alkaline add sulfur or pine needles. 

Yup, you just used science. Congratulations.


Saturday, June 8, 2013

Learning about the Tomatillo


Let's learn about the beautiful & tasty tomatillo 
It won't be this sciencey but might include Latin 
(you've been warned)


Let's start with the some fun alternate names for the tomatillo: "Husk Tomato", "Jamberry", "Husk Cherry", "Mexican Tomato".

The tomatillo is native to Central America and was domesticated around 800 B.C. 
     ( see how it went from fun to facts there... it's going to be a wild ride )

There are two main types of tomatillo ( here comes the Latin )
   Physalis ixocarpa : This is the tomatillo you most often see at the market. It's fruit is green and around 2 inches across, it's flavor is tart and it ripens to a pale shade of yellow ( much like our dining room if you have ever been over for dinner )


   Physalis philidelphica : The lesser known of the tomatillo family ( maintaining it's amateur status ) is a slightly sweeter version of the tomatillo we all know and love except it is also purple and grows to a marble size.


The tomatillo is part of the nightshade family ( Solanaceae ) meaning it is related to the tomato, the potato and the eggplant. Not only are the family reunions weird but they are delicious.

When given plenty of sun and well drained and very rich soil they will produce a very high yield. 

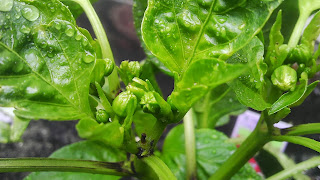
Speaking of harvest... transplants will be ready to harvest around 70 - 100 days. You will know to pick when their husks ( or vascular tissue ) begin to split off of the fruit.

not entirely accurate view of splitting tomatillo
more of a stripping tomatillo


The reason I love that I am growing tomatillos you ask ? Well, It is because they are easy to grow. If grown in a pot and given enough drainage, they are very hard to kill. 

Grow a tomatillo this year and share your favorite recipe with us 


Are we saving money ?

So, the question popped into my head when I looked into our shopping cart at the plant store last week... "Are we saving money by growing our own vegetables?".
The short answer is no. The long answer is yes.

2012-2013 being the first growing season at +The Littlest Farm we are saving no money at all. We didn't keep detailed records ( which I regret ) but we have spent quite a bit on dirt, compost, seeds, new equipment, etc. Even with all of our re-purposing and reusing ( raised beds of pallets etc. ) there were things that we just had to buy.

We are growing things that when we compare the price of a seed to the price at the supermarket are remarkably cheaper. Tomato is much cheaper to grow at home, as are lettuces and squash and next year when all we are buying is a couple cubic feet of soil booster it will be solid savings.

It's important that all gardeners learn that the investment phase of the garden is crucial. I don't speak only of the investment of money, but the investment of time. A properly planned and maintained garden will bring great amounts of food and enjoyment year after year.


Looking at the above graphic you can see the return on investment ( bottom right corner ) is quite impressive. Add to that the gratification of growing your own food and frankly... who cares if you are saving money.... you are gardening. 

Saturday, June 1, 2013

What happened in May.

Well, it's June and that means another month of growth is on the books and it's time to look back and see what we have learned before heading into another month.

We are already working on next years Chard Wars for May the 4th ( be with you ). The responses we  received were great. It's nice to know that our readers like to laugh with us.


A few hard lessons came to us in May with the loss of our celery and rainbow chard. We moved on and planted a few new plants... plants much better suited for our space.

We also picked a potato ( slightly prematurely ) and cooked our one tiny red potato to eat and share a recipe with our dear readers.

Our hope is that June brings even more success here on +The Littlest Farm as we head in to BBQ season we hope to be sharing more recipes from the garden with you.


Tuesday, May 28, 2013

Cool ( as a ) cucumber thing.


In yet another effort to use everything that we can get our hands on Meg grabbed some plum branches that were being pruned. The idea is to strip them of their bark, sink them into one of our raised beds, lash them together at the top with the stripped bark and use them for our cucumbers to vine.

Here is how she did it.

You will need:
  • branches of a sapling
  • a knife
  • bucket filled with water
  • pruning shears


First trim back all of the leafy branches leaving the strong main branch.
Hold onto those smaller branches though. You will need them.

After scoring the length of the branch peel back the bark

Soak bark for 15 to 20 minutes

Choose your location for the tripod


Using the soaked bark lash the tops together

Using the smaller branches begin your trellis. Lashing 
sets of branches using bark. 

Plant your cukes...

...stand back and admire. 

All in all the the project took around an hour and was fairly simple to do.  Plus, it looks really cool in the garden. 


Saturday, May 18, 2013

Mounds of Squash

We have a few squash going now in the lower garden ( squashes ? squishes ? what is the proper plural for squash ? ) anyway, we have some squishes growing now and I thought I would cover some squash basics that I have learned.

Fun fact : Squash are one of the oldest plants to be cultivated in the Americas. The other two are corn and beans.

 Here is a common question..Why does squash need to be planted on a "hill" ? Well, it's because they love water but need excellent drainage. The soil also warms better this way.  The mound or "hill" gives them everything they need to produce great amounts.


Summer squash can mature very quickly providing fruit in 50 days or so and the more you pick the more you will get.


It is also recommended to participate in the sex life of your squash. Don't blush now. Hand pollination to ensure pollination of the female flowers in turn ensuring baby squashes. Even if you have busy bees and butterflies this is a good idea. Simply take a small paintbrush and transfer pollen from the male plant to the stamens of the female.( Both pictured below ).

The Female

The Male

Do you have any squash growing tips? Share in the comments or hit us up on Google Plus or Facebook. 


Tuesday, May 14, 2013

The Littlest Potato

A recipe for one.

Not long ago Meg & I looked at our Potato Cage  and we saw a little root poking out... and there it was...

The Littlest Potato

We stuck it back in its place, gave it some encouraging words and waited... staring at the dirt gets boring after a while so we went and did some other things. 
Slightly less little potato


This stubborn potato fought again toward the surface so we plucked it, cooked it and ate it. 

Here is our recipe for one potato. It probably isn't a good recipe for a dinner party. 

First be sure to clean the potato thoroughly. It worked very hard at growing and deserves a proper death. Certainly don't yell "Get in my belly !"  at it. It's very rude. 

Boil for 10 minutes ( or until done ) 


Drain and Slice your potato

Add 1/32 of a tablespoon of butter and 22% of a pinch of parsley.
6 grains of salt and a 1/4 grind of pepper. 

Enjoy!