Showing posts with label instruction. Show all posts

Tuesday, May 6, 2014

Raised Beds ( take 2 )


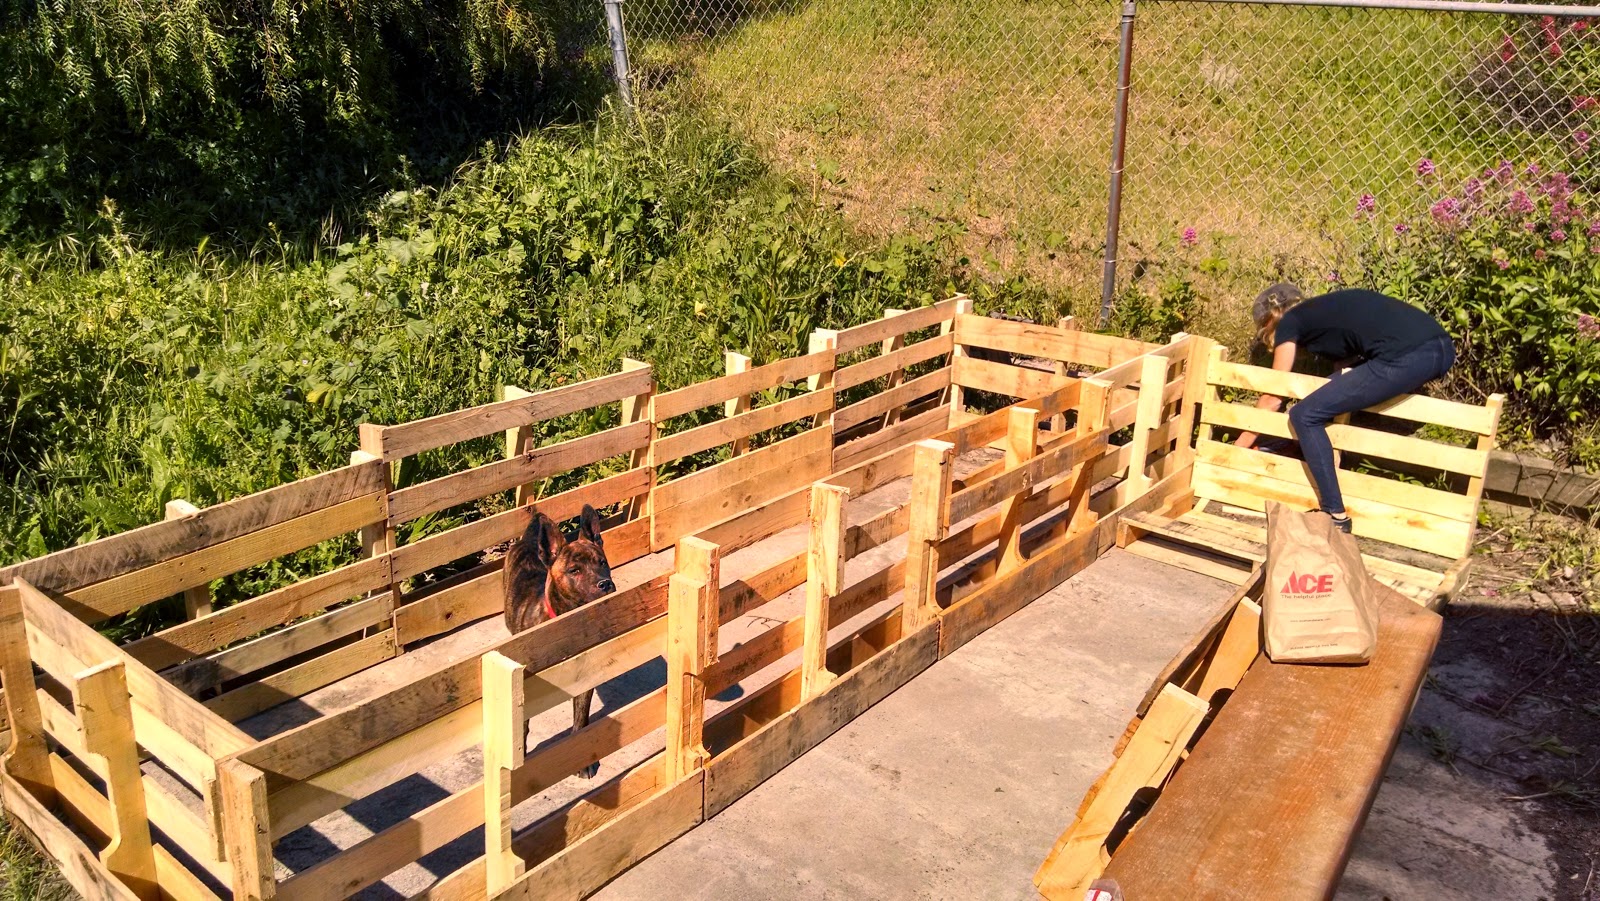
Some of you may remember our raised beds from last year. We used discarded pallets, broke them down to individual slats and rebuilt them into raised beds. Overall they worked wonderfully , but the major flaw was that they we a lot of work. It took us nearly two weeks ( on days off and after work ) to assemble 5 beds. This years effort took only about 2 hours to assemble and yielded over 80 square feet of growing area. 

As always we start with pallets.
12 in all, all cut in half.


Using wood screws we begin to piece them together.


It's a surprisingly fast process.


We lined the bottom with tree trimmings that 
would have been heading for the compost otherwise.

add 4 bales of straw 


Break up and spread the straw

Add a layer of compost

Spread to near the edges and make sure it is 6-8 inches deep.


Water thoroughly


Plan and Plant.

The medium of straw and compost has maintained an ideal temperature for growing. Our sprouts are coming up strong and fast. Some seeds ahead of their expected germination. As always we let you know how it progresses. 

Now enjoy this silly video of us ( and the dog helping ) build these beds. 


Tuesday, May 28, 2013

Cool ( as a ) cucumber thing.


In yet another effort to use everything that we can get our hands on Meg grabbed some plum branches that were being pruned. The idea is to strip them of their bark, sink them into one of our raised beds, lash them together at the top with the stripped bark and use them for our cucumbers to vine.

Here is how she did it.

You will need:
  • branches of a sapling
  • a knife
  • bucket filled with water
  • pruning shears


First trim back all of the leafy branches leaving the strong main branch.
Hold onto those smaller branches though. You will need them.

After scoring the length of the branch peel back the bark

Soak bark for 15 to 20 minutes

Choose your location for the tripod


Using the soaked bark lash the tops together

Using the smaller branches begin your trellis. Lashing 
sets of branches using bark. 

Plant your cukes...

...stand back and admire. 

All in all the the project took around an hour and was fairly simple to do.  Plus, it looks really cool in the garden. 


Saturday, May 18, 2013

Mounds of Squash

We have a few squash going now in the lower garden ( squashes ? squishes ? what is the proper plural for squash ? ) anyway, we have some squishes growing now and I thought I would cover some squash basics that I have learned.

Fun fact : Squash are one of the oldest plants to be cultivated in the Americas. The other two are corn and beans.

 Here is a common question..Why does squash need to be planted on a "hill" ? Well, it's because they love water but need excellent drainage. The soil also warms better this way.  The mound or "hill" gives them everything they need to produce great amounts.


Summer squash can mature very quickly providing fruit in 50 days or so and the more you pick the more you will get.


It is also recommended to participate in the sex life of your squash. Don't blush now. Hand pollination to ensure pollination of the female flowers in turn ensuring baby squashes. Even if you have busy bees and butterflies this is a good idea. Simply take a small paintbrush and transfer pollen from the male plant to the stamens of the female.( Both pictured below ).

The Female

The Male

Do you have any squash growing tips? Share in the comments or hit us up on Google Plus or Facebook. 


Tuesday, May 14, 2013

The Littlest Potato

A recipe for one.

Not long ago Meg & I looked at our Potato Cage  and we saw a little root poking out... and there it was...

The Littlest Potato

We stuck it back in its place, gave it some encouraging words and waited... staring at the dirt gets boring after a while so we went and did some other things. 
Slightly less little potato


This stubborn potato fought again toward the surface so we plucked it, cooked it and ate it. 

Here is our recipe for one potato. It probably isn't a good recipe for a dinner party. 

First be sure to clean the potato thoroughly. It worked very hard at growing and deserves a proper death. Certainly don't yell "Get in my belly !"  at it. It's very rude. 

Boil for 10 minutes ( or until done ) 


Drain and Slice your potato

Add 1/32 of a tablespoon of butter and 22% of a pinch of parsley.
6 grains of salt and a 1/4 grind of pepper. 

Enjoy!


Tuesday, April 23, 2013

The Life of Cabbage

Among the produce we have growing is red cabbage. Neither of us have grown cabbage before and knew nothing going in. We have had a warm spell here in California that had us concerned that the cabbage ( among others ) was bolting and wasn't going to properly grow and produce.
This prompted a Google search and a lot of learning about cabbage.


Stage 2 ( our current stage )

We looked at our plants and didn't see cabbage, we saw a weed like sprout in our beds. It will continue on like this, adding leaves and stems and leaves until stage 5 when it starts to look like it wants you to make soup out of it. 

Stage 5 a.k.a "pre-cupping"

By the end of stage 5 the base and the stems are completely concealed when viewing from above. 

When we hit stage 6 all we will be thinking about is corned beef recipes.

Stage 6 a.k.a. "cupping"

At stage six we will have between 20 and 25 leaves and the innermost "heart" leaves will be concealed by the larger older leaves. Then we leap forward to stage 9 ... Mature Cabbage !

Huzzah ! Let's throw them at lousy vaudeville comedians !

I am rather disappointed that not a single paper I read, website I looked at or stranger on the street could explain to me how it is that creepy dolls come from cabbage. 

How ?! Why?!


Saturday, April 13, 2013

The Great Potato Nipple

Today we made some modifications to The Great Potato Experiment. It seems we missed a few small details in our slightly less than careful planning of our potato cage.

It seems obvious to us now, but we weren't getting enough water to the lower layers of taters... so after great debate and discussion we made what I am calling The Potato Nipple & for the record Meghan refuses to refer to it that way.

The problem was that the cage was 3 feet high and we needed water to make it at least 2 feet down so that it would soak the rest of the way down. 4 dollars in PVC pipe & fittings later we had it solved.
Here is how we did it.


The plants toward the top are doing much better than the one toward the bottom. So we wet the soil and hammered a 1 inch schedule 40 piece of PVC down the middle of the cage to create a cavity.

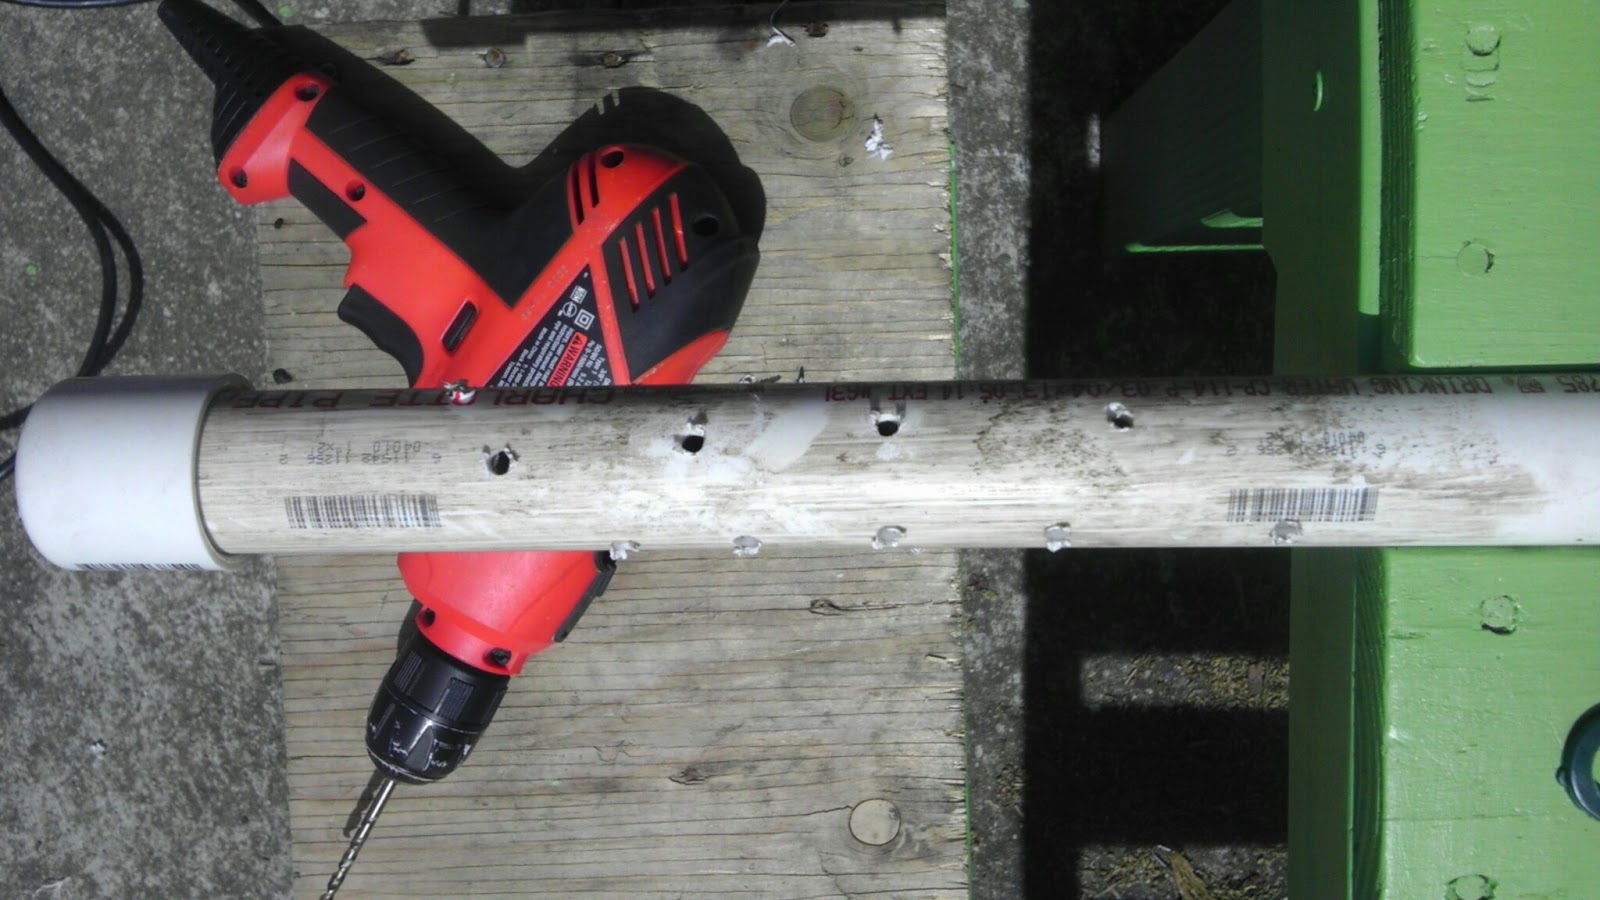
Once the wet soil had settled ( about 3 hours ) we pulled the pipe out & drilled several ( alot ! ) of 3/16 holes in the lover half of the pipe, put a cap on one end and a 1 inch couple on the other ( for stability )


We reinserted the pipe into the cavity ( holes drilled & cap on ) and put an inverted bottle on top filled with water ( not whiskey ) to create a slow drip system.

Happy Taters 

All of that being said, what we should have done is put a perforated pipe down the center of the cage when we initially planted, designated a hose ( or similar re-purposed drip system ) for watering. Either way we are still looking at a harvest of over 100 potatoes on a footprint of less than 3 feet. We got to be creative on an already creative idea and we are going to yield a lot of food.


Tuesday, March 26, 2013

Attracting birds and bugs.

Some parts of gardening can be unintentionally rewarding. Here at the +The Littlest Farm we are finding that our garden is turning us into amateur birders. It has motivated us to make space in our garden for birds, bugs and all sorts of needed critters.

Some of you might remember my Insect Hotel from a few months ago.


We have also placed multiple bird feeders and a bath


Today my lovely wife designed and built something for the more adventurous birds ( and likely squirrels ).

It is another adventure in re-purposing.

Using two old wire coat hangers ( hook portion cut off ) Meg took needle nose pliers and bent
them into a selection of shapes.


Add a couple apples on the ends...


... and you have a lovely decoration for the garden that feeds a bunch of critters. 


Saturday, March 23, 2013

Side Project : Broken Pot Garden


Sometimes, when you are just waiting for your plants to grow or having a hard time deciding what chicken breed you take on a weird project. This is a weird project.

Inspired by my clumsiness and our determination to let nothing go to waste we but together a little art project for the garden.


There was no hoping super glue would help here. Something else needed to be done to keep this from heading to the landfill.

A little creative hammer work

A delicate idea


Place the stairs


Some ground cover


An awesome world where dinosaurs hunt sheep.