Showing posts with label re-use. Show all posts

Tuesday, May 6, 2014

Raised Beds ( take 2 )


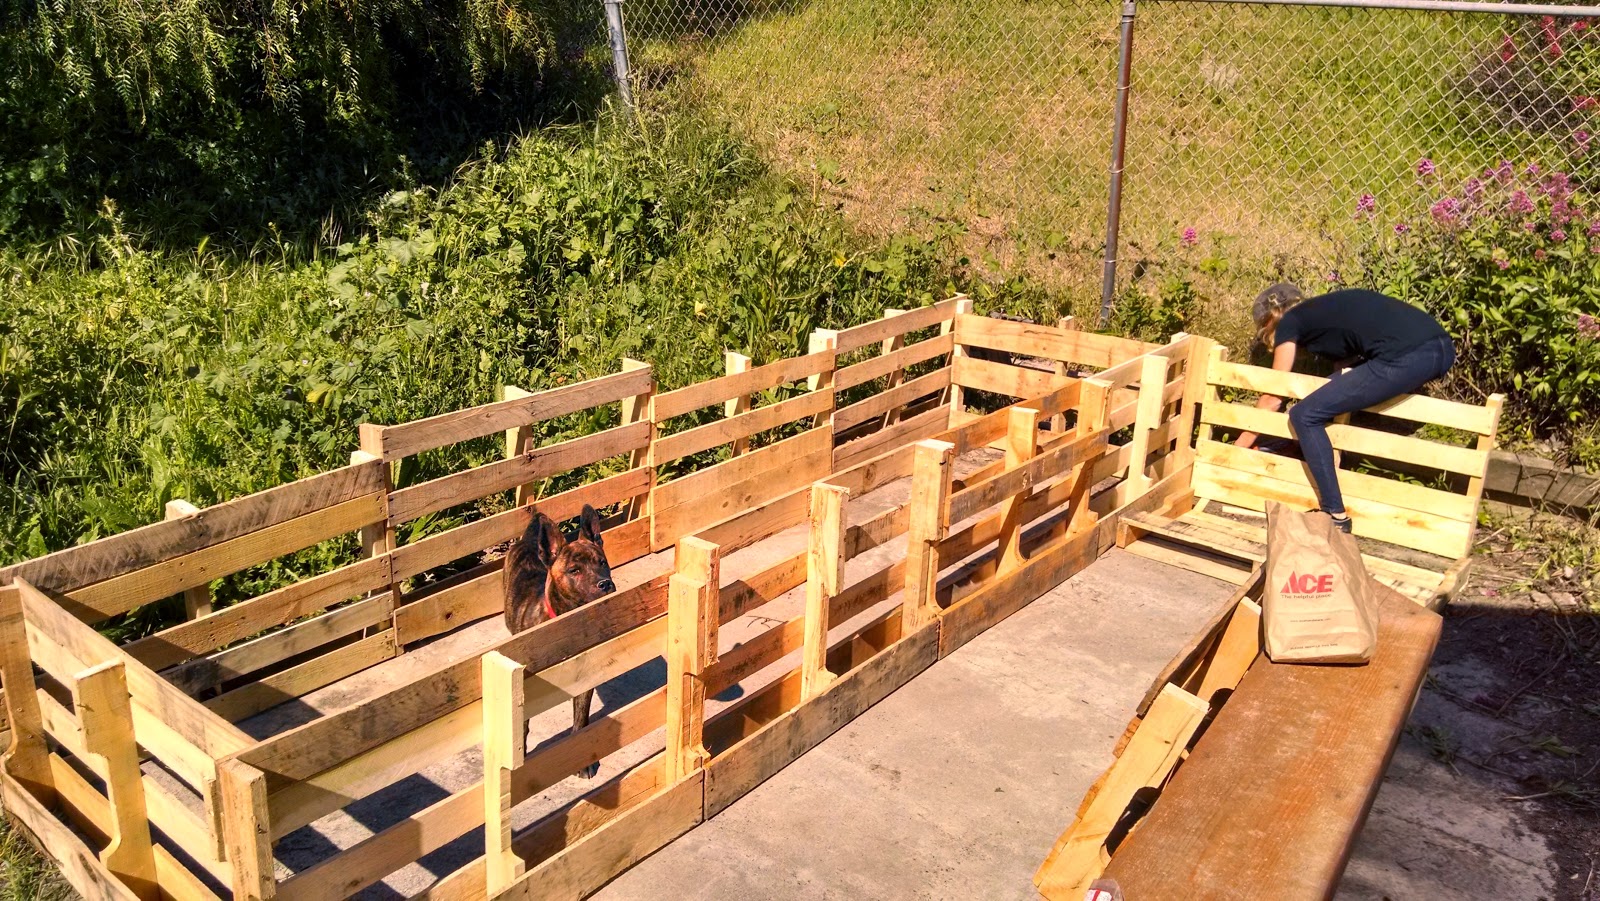
Some of you may remember our raised beds from last year. We used discarded pallets, broke them down to individual slats and rebuilt them into raised beds. Overall they worked wonderfully , but the major flaw was that they we a lot of work. It took us nearly two weeks ( on days off and after work ) to assemble 5 beds. This years effort took only about 2 hours to assemble and yielded over 80 square feet of growing area. 

As always we start with pallets.
12 in all, all cut in half.


Using wood screws we begin to piece them together.


It's a surprisingly fast process.


We lined the bottom with tree trimmings that 
would have been heading for the compost otherwise.

add 4 bales of straw 


Break up and spread the straw

Add a layer of compost

Spread to near the edges and make sure it is 6-8 inches deep.


Water thoroughly


Plan and Plant.

The medium of straw and compost has maintained an ideal temperature for growing. Our sprouts are coming up strong and fast. Some seeds ahead of their expected germination. As always we let you know how it progresses. 

Now enjoy this silly video of us ( and the dog helping ) build these beds. 


Tuesday, June 18, 2013

Pallet Table (a.k.a. palatable)

I apologize for the poor pun / word play of the table. I assure you that this is a serious post about making a table from a pallet and will involve no shenanigans or squirrels drinking beer.


In the beginning there was a pallet & no where to sit. 

Nowhere to enjoy a meal.

Nowhere to pry the fruit of its pit.

Only bad poems written with zeal. 


This table was built in the background over a couple of months, you may have (literately) noticed in the background in photos since we began. 

We started with a pallet, a pry bar and an idea. This is our idea of re-purposing.  

It turned out one 4x4 wouldn't hold up the table.

We added 3 more

The last two pictures have our benches in the background :) ...

We built them so the squirrel had somewhere to drink his beer

A wee bit of paint...

Some found foam and purchased vinyl 


Come on over... let's have a BBQ


Tuesday, May 28, 2013

Cool ( as a ) cucumber thing.


In yet another effort to use everything that we can get our hands on Meg grabbed some plum branches that were being pruned. The idea is to strip them of their bark, sink them into one of our raised beds, lash them together at the top with the stripped bark and use them for our cucumbers to vine.

Here is how she did it.

You will need:
  • branches of a sapling
  • a knife
  • bucket filled with water
  • pruning shears


First trim back all of the leafy branches leaving the strong main branch.
Hold onto those smaller branches though. You will need them.

After scoring the length of the branch peel back the bark

Soak bark for 15 to 20 minutes

Choose your location for the tripod


Using the soaked bark lash the tops together

Using the smaller branches begin your trellis. Lashing 
sets of branches using bark. 

Plant your cukes...

...stand back and admire. 

All in all the the project took around an hour and was fairly simple to do.  Plus, it looks really cool in the garden. 


Saturday, April 13, 2013

The Great Potato Nipple

Today we made some modifications to The Great Potato Experiment. It seems we missed a few small details in our slightly less than careful planning of our potato cage.

It seems obvious to us now, but we weren't getting enough water to the lower layers of taters... so after great debate and discussion we made what I am calling The Potato Nipple & for the record Meghan refuses to refer to it that way.

The problem was that the cage was 3 feet high and we needed water to make it at least 2 feet down so that it would soak the rest of the way down. 4 dollars in PVC pipe & fittings later we had it solved.
Here is how we did it.


The plants toward the top are doing much better than the one toward the bottom. So we wet the soil and hammered a 1 inch schedule 40 piece of PVC down the middle of the cage to create a cavity.

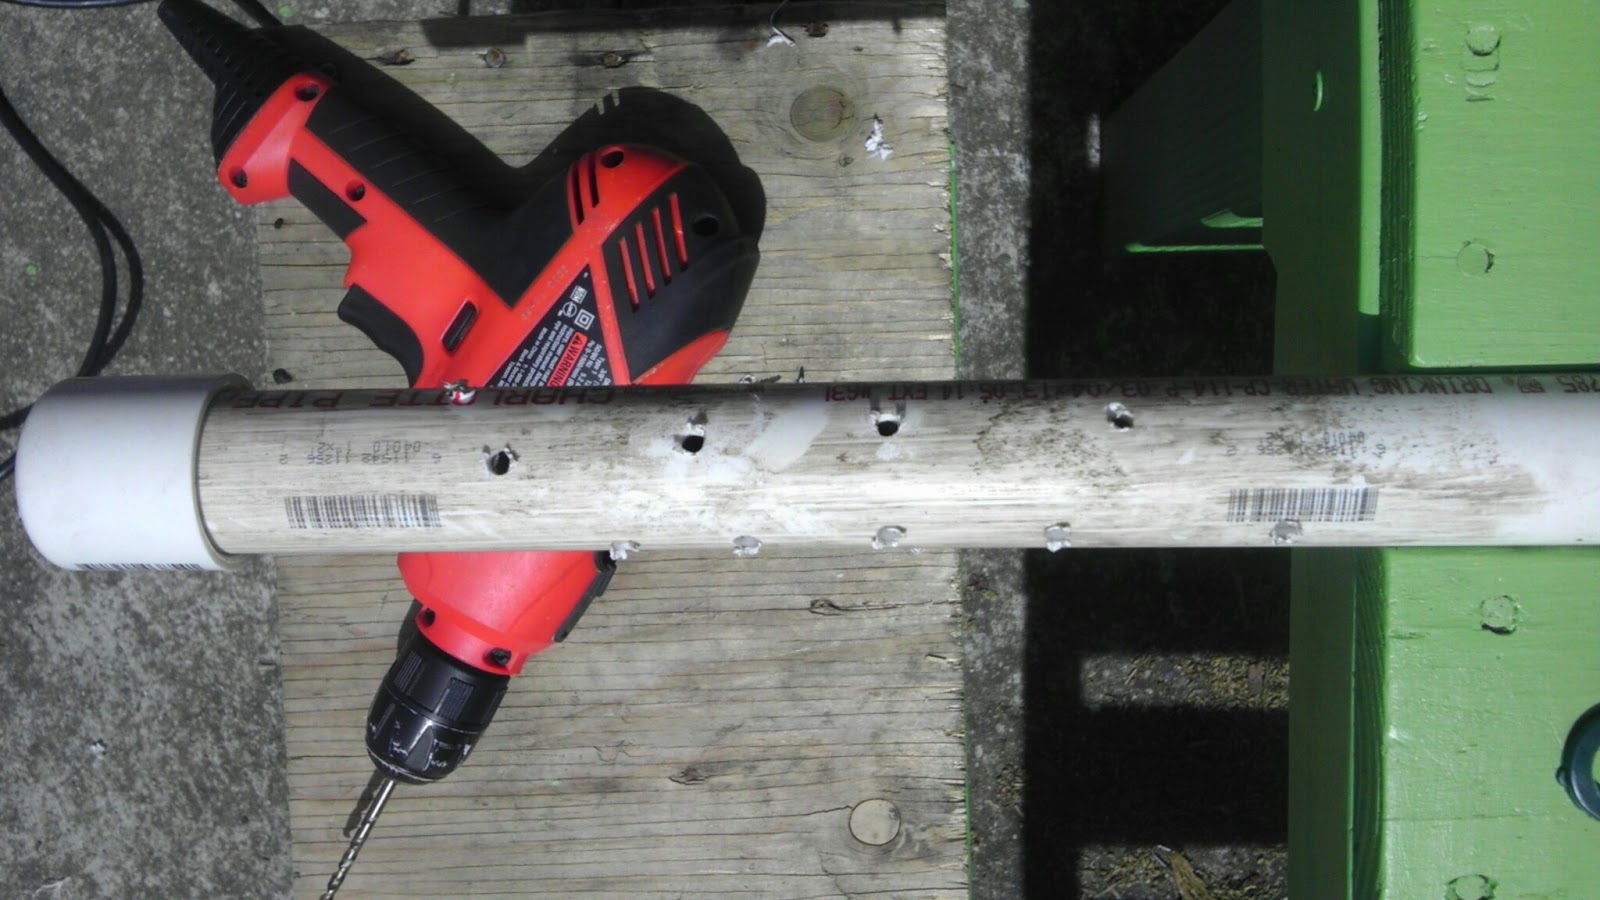
Once the wet soil had settled ( about 3 hours ) we pulled the pipe out & drilled several ( alot ! ) of 3/16 holes in the lover half of the pipe, put a cap on one end and a 1 inch couple on the other ( for stability )


We reinserted the pipe into the cavity ( holes drilled & cap on ) and put an inverted bottle on top filled with water ( not whiskey ) to create a slow drip system.

Happy Taters 

All of that being said, what we should have done is put a perforated pipe down the center of the cage when we initially planted, designated a hose ( or similar re-purposed drip system ) for watering. Either way we are still looking at a harvest of over 100 potatoes on a footprint of less than 3 feet. We got to be creative on an already creative idea and we are going to yield a lot of food.


Tuesday, April 9, 2013

Chard Wars

It's a beautiful day in the bay area. 73 degrees Fahrenheit, sunny and nothing to do in the garden but water and watch everything grow.

Or.... be silly and stage the many battles of the epic sci-fi series Chard Wars 


Battle of Strawberry Buds

The Empire invasion of Carrots 

Radish Troopers are done looking for droids


The Epic Chard Wars. 
patent pending :) 


Sunday, April 7, 2013

Building a raised bed

It occurred to me today while helping a customer at the hardware store that not everyone knows how to build a raised bed... much less no how to plan what to put in it. So, starting today +The Littlest Farm  will be putting more effort into sharing the basics to help people get started growing.


This is a pretty solid tutorial. 


Never forget that the internet is a never ending source of plans. My personal favorite is Popular Mechanics. Their raised bed plans are unrivaled. 

Happy Growing! 


Tuesday, April 2, 2013

Creatures of the night are eating my cabbage !

Slugs, snails and other slimy creatures are attempting an invasion and we are holding our ground... slaying them by the dozens and using only natural techniques victory will soon be ours.

Most people see them like this


Gardeners see them like this

Fortunately, there is a good selection of natural techniques to keep this hungry critters at bay. 

Our first step is identifying what plants they have a particular taste for. You can't battle an enemy if you don't know where they are.

The next thing we do is set up a barrier. This can be done with crushed egg shells around the damaged plants, or discarded coffee grounds. You will want to make sure the barrier is between 2 and 3 inches thick. 

We tend to avoid the copper method mainly because it can be expensive but you can try this at home by purchasing copper tape at your local hardware store or garden supply. This through either magic or science electrocutes the little monsters and kills them. 

The favorite method at The Littlest Farm is beer. There are two ways to use beer, one more effective than the other. We save our empty cat food and tuna fish cans bury them in the soil, fill them with cheap beer ( slugs and snails have notoriously poor taste in beer ) and wait for those pesky mollusks to drink themselves to death. 


The second beer method is to just drink the beer, ignore the problem and have a good time. This method is significantly less effective.

What methods do you use? 

Saturday, March 23, 2013

Side Project : Broken Pot Garden


Sometimes, when you are just waiting for your plants to grow or having a hard time deciding what chicken breed you take on a weird project. This is a weird project.

Inspired by my clumsiness and our determination to let nothing go to waste we but together a little art project for the garden.


There was no hoping super glue would help here. Something else needed to be done to keep this from heading to the landfill.

A little creative hammer work

A delicate idea


Place the stairs


Some ground cover


An awesome world where dinosaurs hunt sheep.