Showing posts with label recycle. Show all posts

Tuesday, June 18, 2013

Pallet Table (a.k.a. palatable)

I apologize for the poor pun / word play of the table. I assure you that this is a serious post about making a table from a pallet and will involve no shenanigans or squirrels drinking beer.


In the beginning there was a pallet & no where to sit. 

Nowhere to enjoy a meal.

Nowhere to pry the fruit of its pit.

Only bad poems written with zeal. 


This table was built in the background over a couple of months, you may have (literately) noticed in the background in photos since we began. 

We started with a pallet, a pry bar and an idea. This is our idea of re-purposing.  

It turned out one 4x4 wouldn't hold up the table.

We added 3 more

The last two pictures have our benches in the background :) ...

We built them so the squirrel had somewhere to drink his beer

A wee bit of paint...

Some found foam and purchased vinyl 


Come on over... let's have a BBQ


Tuesday, April 9, 2013

Chard Wars

It's a beautiful day in the bay area. 73 degrees Fahrenheit, sunny and nothing to do in the garden but water and watch everything grow.

Or.... be silly and stage the many battles of the epic sci-fi series Chard Wars 


Battle of Strawberry Buds

The Empire invasion of Carrots 

Radish Troopers are done looking for droids


The Epic Chard Wars. 
patent pending :) 


Tuesday, April 2, 2013

Creatures of the night are eating my cabbage !

Slugs, snails and other slimy creatures are attempting an invasion and we are holding our ground... slaying them by the dozens and using only natural techniques victory will soon be ours.

Most people see them like this


Gardeners see them like this

Fortunately, there is a good selection of natural techniques to keep this hungry critters at bay. 

Our first step is identifying what plants they have a particular taste for. You can't battle an enemy if you don't know where they are.

The next thing we do is set up a barrier. This can be done with crushed egg shells around the damaged plants, or discarded coffee grounds. You will want to make sure the barrier is between 2 and 3 inches thick. 

We tend to avoid the copper method mainly because it can be expensive but you can try this at home by purchasing copper tape at your local hardware store or garden supply. This through either magic or science electrocutes the little monsters and kills them. 

The favorite method at The Littlest Farm is beer. There are two ways to use beer, one more effective than the other. We save our empty cat food and tuna fish cans bury them in the soil, fill them with cheap beer ( slugs and snails have notoriously poor taste in beer ) and wait for those pesky mollusks to drink themselves to death. 


The second beer method is to just drink the beer, ignore the problem and have a good time. This method is significantly less effective.

What methods do you use? 

Saturday, March 23, 2013

Side Project : Broken Pot Garden


Sometimes, when you are just waiting for your plants to grow or having a hard time deciding what chicken breed you take on a weird project. This is a weird project.

Inspired by my clumsiness and our determination to let nothing go to waste we but together a little art project for the garden.


There was no hoping super glue would help here. Something else needed to be done to keep this from heading to the landfill.

A little creative hammer work

A delicate idea


Place the stairs


Some ground cover


An awesome world where dinosaurs hunt sheep. 

Thursday, February 14, 2013

Getting Our Herbs and Flowers Started

It's a lovely day here in the East Bay. We hit around 70 degrees in the hills and with the sun beating down on us we were highly motivated to get some seeds going.

The focus was on herbs and flowers today. Somewhere between 150-200 of them as a matter of fact. We aren't growing 200 different herbs and flowers we are starting that many seeds in hope of a 50% success rate.

Our bag of boxes

You remember how to make seed start boxes right

Fill 'em with dirt

Water & Wait 


* A couple notes that apply to our ever increasing effort to reuse as much as possible. 
The boxes are made from grocery bags and the plant identifiers are made from a cut up milk jug. 


Tuesday, February 12, 2013

Re-using + Re-purposing = Awesome


I had my first day off in a while today and decided to make a concentrated effort in reducing our pile of "scrap" wood. If you have been following The Littlest Farm you know that we make use of discarded pallets for most of our projects. When you use pallets you end up with seemingly useless scraps. My goal today was to use the useless. I think I did an okay job...

The scrap pile

My first idea was to add to the table we had built earlier in the week. So I threw together a condiment box for our many BBQ's.


Yes, that table is made from a pallet. 90% of what we build is made from pallets... why are you surprised?
I had some 2x4's laying around and so after the box I started making benches. I wanted to make chairs but frankly I'm not that gifted a carpenter. 

Kilgore approved

Squirrel approved

Now we have a complete outdoor dining area. Table, seats... squirrel people and cheap beer. By the time it's BBQ season here this is going to be one awesome garden. 


Thursday, January 17, 2013

Bean Teepee

We are hoping to build a bean tee-pee to go along with our early planting in February. If you have never had a bean tee-pee they are fun to build, have and eat. You create a great growing area for runner beans and end up with a neat little edible fort and who doesn't love a fort. I might be a technical adult but there is a child inside of me that gets all worked up at the idea of having a fort in the yard.

                                                         photo credit http://lillbutton2.blogspot.com/


Anyway, after a little bit of reading I have seen just how easy it can be to build a bean tee-pee. All you really need is bean seeds or starts, 6 to 8 bamboo or wooden poles each about 6 feet tall and a little wire to bind the whole thing together.
Clear a nice level spot that gets a lot of sun.The size of the circle will vary on the height of the poles ( use your best judgement here ). Once you have your circle set up begin putting out your poles at equal distances around the circle being sure to leave a large enough space in the front to get inside the tee-pee.
Sink each pole about six inches into the soil and lash them together at the top. If it doesn't seem very stable set up support wires horizontally every 2 feet or so ( again being sure to leave yourself room to get inside the tee-pee ).


Once you are set up plant 4 or 5 bean plants per upright and watch it grow.
It is important to ( once your plants have grown ) to harvest inside as much as on the outside to keep your proud structure/fort/trellis from collapsing. 

Enjoy! 


Tuesday, January 15, 2013

Spring is coming

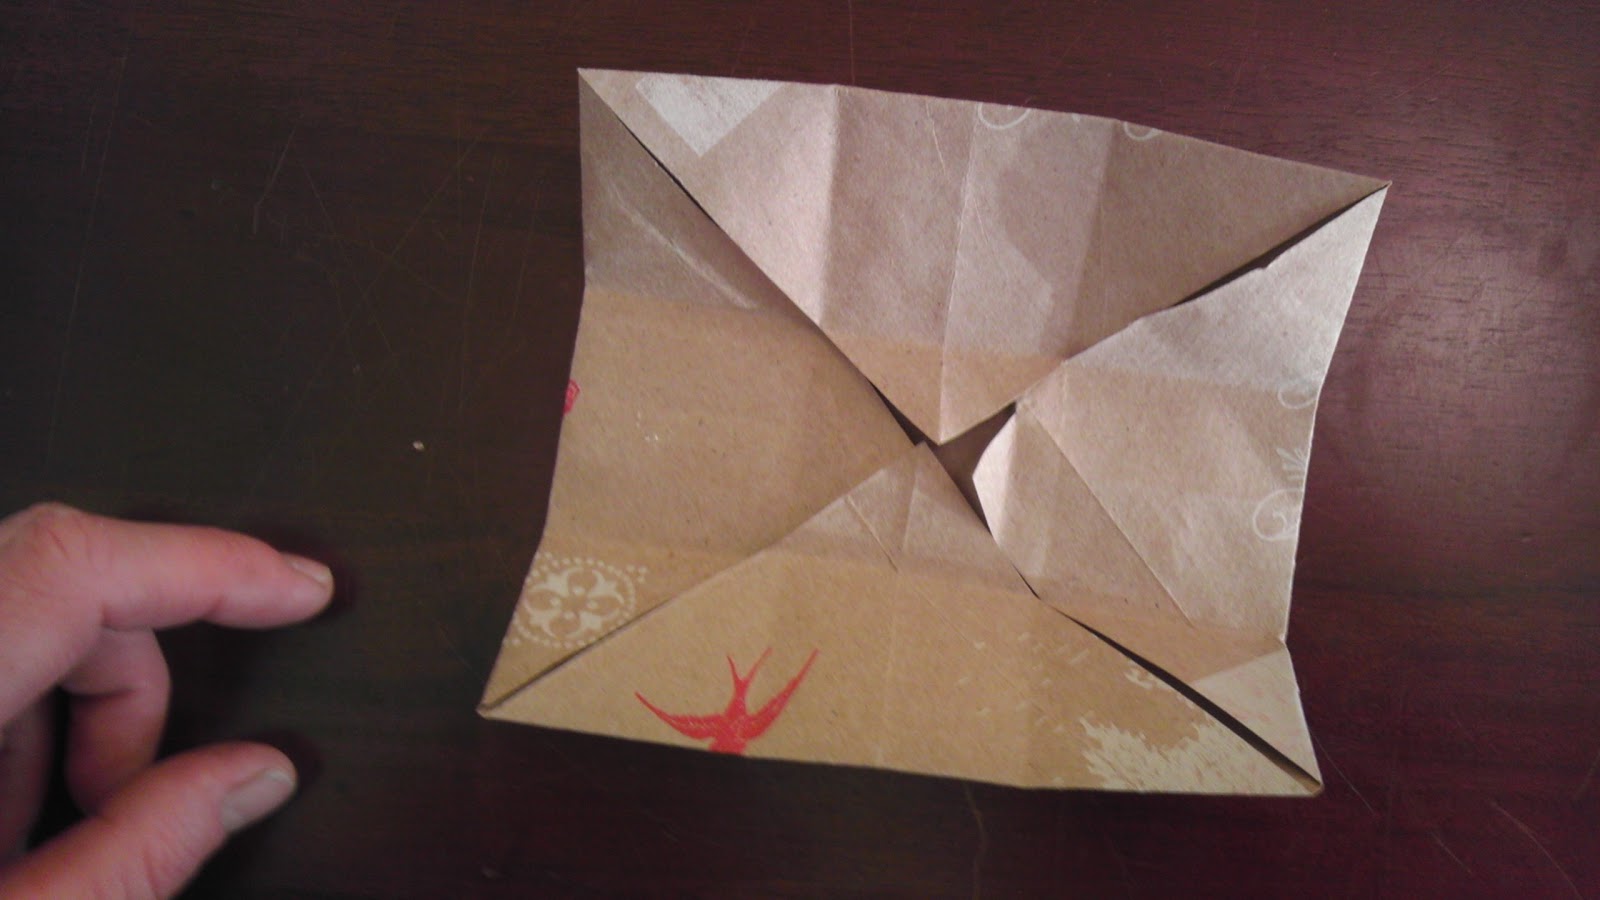
With spring just around the corner ( some of us closer to the corner than others ) some preparations need to be made. For us, the chief among them is getting our sees started. In a previous post we talked about the mini-greenhouses that we germinate in and briefly mentioned the origami boxes we make for each future plant to start in. Here is how to make those boxes.

We start by cutting up a paper bag into 7 x 7 inch squares ( giving us about 10 squares per bag ). 


Then the folding begins. 
Fold the square twice into a triangle.
Unfold your creased triangle
and turn the corners in.

Fold into thirds lengthwise

Crease and again unfold.


Fold in the corners
Fold up the two sides of the 1/3 fold and 
tuck in the ends.

Tuck in the other end.
There you go !
A 1 3/4 square box perfect for starting seeds indoor or outdoor.