Showing posts with label vegetables. Show all posts

Tuesday, May 28, 2013

Cool ( as a ) cucumber thing.


In yet another effort to use everything that we can get our hands on Meg grabbed some plum branches that were being pruned. The idea is to strip them of their bark, sink them into one of our raised beds, lash them together at the top with the stripped bark and use them for our cucumbers to vine.

Here is how she did it.

You will need:
  • branches of a sapling
  • a knife
  • bucket filled with water
  • pruning shears


First trim back all of the leafy branches leaving the strong main branch.
Hold onto those smaller branches though. You will need them.

After scoring the length of the branch peel back the bark

Soak bark for 15 to 20 minutes

Choose your location for the tripod


Using the soaked bark lash the tops together

Using the smaller branches begin your trellis. Lashing 
sets of branches using bark. 

Plant your cukes...

...stand back and admire. 

All in all the the project took around an hour and was fairly simple to do.  Plus, it looks really cool in the garden. 


Thursday, January 17, 2013

Bean Teepee

We are hoping to build a bean tee-pee to go along with our early planting in February. If you have never had a bean tee-pee they are fun to build, have and eat. You create a great growing area for runner beans and end up with a neat little edible fort and who doesn't love a fort. I might be a technical adult but there is a child inside of me that gets all worked up at the idea of having a fort in the yard.

                                                         photo credit http://lillbutton2.blogspot.com/


Anyway, after a little bit of reading I have seen just how easy it can be to build a bean tee-pee. All you really need is bean seeds or starts, 6 to 8 bamboo or wooden poles each about 6 feet tall and a little wire to bind the whole thing together.
Clear a nice level spot that gets a lot of sun.The size of the circle will vary on the height of the poles ( use your best judgement here ). Once you have your circle set up begin putting out your poles at equal distances around the circle being sure to leave a large enough space in the front to get inside the tee-pee.
Sink each pole about six inches into the soil and lash them together at the top. If it doesn't seem very stable set up support wires horizontally every 2 feet or so ( again being sure to leave yourself room to get inside the tee-pee ).


Once you are set up plant 4 or 5 bean plants per upright and watch it grow.
It is important to ( once your plants have grown ) to harvest inside as much as on the outside to keep your proud structure/fort/trellis from collapsing. 

Enjoy! 


Tuesday, January 15, 2013

Spring is coming

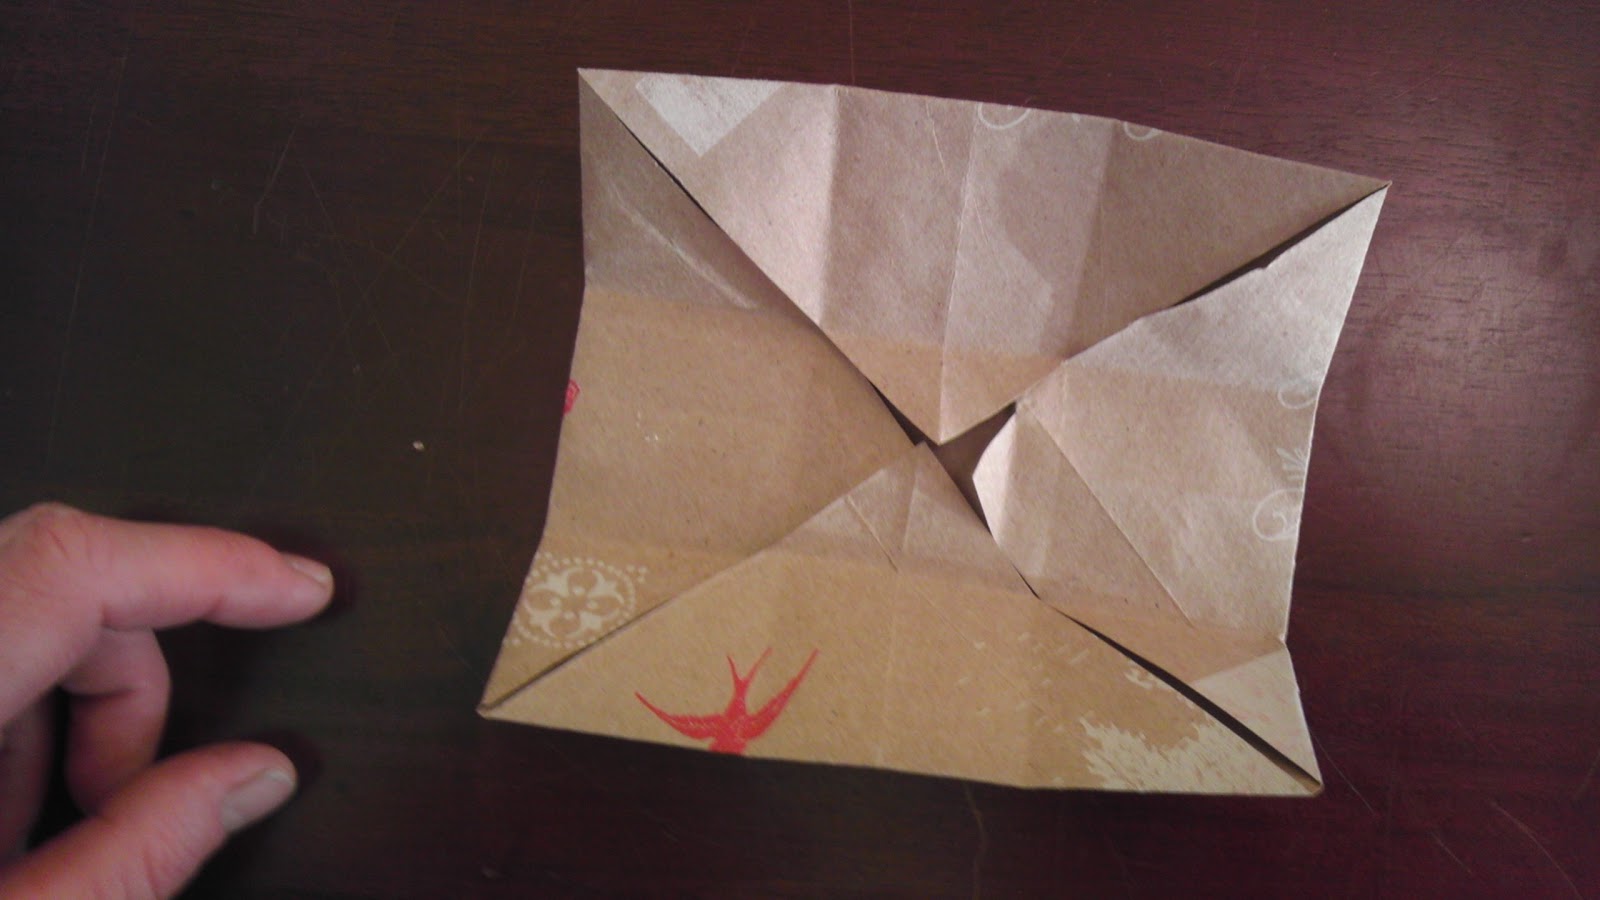
With spring just around the corner ( some of us closer to the corner than others ) some preparations need to be made. For us, the chief among them is getting our sees started. In a previous post we talked about the mini-greenhouses that we germinate in and briefly mentioned the origami boxes we make for each future plant to start in. Here is how to make those boxes.

We start by cutting up a paper bag into 7 x 7 inch squares ( giving us about 10 squares per bag ). 


Then the folding begins. 
Fold the square twice into a triangle.
Unfold your creased triangle
and turn the corners in.

Fold into thirds lengthwise

Crease and again unfold.


Fold in the corners
Fold up the two sides of the 1/3 fold and 
tuck in the ends.

Tuck in the other end.
There you go !
A 1 3/4 square box perfect for starting seeds indoor or outdoor.

Wednesday, January 2, 2013

So many things done

Sooo many things.

We woke yesterday morning with a new years vigor... as it turns out we don't drink enough.

By 9 a.m. we were breaking down pallets to build our raised beds.


By 10 a.m. we were squirrels 
( these things happen ) 


But, by Noon we were building raised beds, working on our GIGANTIC compost bin and generally falling in love with the littlest farm.

Here are some pictures :
building a new compost bin 
(from recycled pallets)

Cutting up pallets to make planter boxes


Raised bed made from 100% recycled materials.

I've said it before and I'll say it again. Pallets are a urban farmers best friend. 


Sunday, December 30, 2012

The Littlest Greenhouse


I ( very conveniently ) work at a hardware store. This gives me easy access to recycled materials like pallets ( for making planter boxes etc. ) and also affords me the ability to make odd things out of odds and ends. Today I made tiny little greenhouses with +Brian Assef out of clear plastic buckets. It took us about 15 minutes to make two & now Brian and his girlfriend have somewhere to start seeds safe from their cats and frost.

This is the bucket with proposed venting holes marked.

 Brian drilling the holes.

Taking a break in a shopping cart.

The finished product.

As I said before, it only took about 15 minutes and was made entirely from recycled materials. Voila, the littlest greenhouse. 


*Update
Only 10 days after planting +Brian Assef is seeing results from his micro greenhouse.


We will be giving more updates later from Brian's really little & tiny farm. 

Until then here is a video of Brian working hard...


Sunday, December 16, 2012

Growing in Straw Bales

We have been doing a lot of research into growing in straw bales. It is a brilliant way to garden organically when you are short on space.
People we have talked to with experience have grown primarily root vegetables but I am finding there are endless options.
It is a great alternative to planter boxes.

From what we understand straw bales are better than hay bales because hay bales contain seeds and you would essentially be importing weeds into your garden voluntarily.
They can support tall plants so corn, tomatoes and vine beans are possible.
The bales make great compost after harvest.

Anyone have any experience? Tips or tricks let us know...

You can follow us on Facebook and Google+