Showing posts with label NORCAL. Show all posts

Tuesday, May 28, 2013

Cool ( as a ) cucumber thing.


In yet another effort to use everything that we can get our hands on Meg grabbed some plum branches that were being pruned. The idea is to strip them of their bark, sink them into one of our raised beds, lash them together at the top with the stripped bark and use them for our cucumbers to vine.

Here is how she did it.

You will need:
  • branches of a sapling
  • a knife
  • bucket filled with water
  • pruning shears


First trim back all of the leafy branches leaving the strong main branch.
Hold onto those smaller branches though. You will need them.

After scoring the length of the branch peel back the bark

Soak bark for 15 to 20 minutes

Choose your location for the tripod


Using the soaked bark lash the tops together

Using the smaller branches begin your trellis. Lashing 
sets of branches using bark. 

Plant your cukes...

...stand back and admire. 

All in all the the project took around an hour and was fairly simple to do.  Plus, it looks really cool in the garden. 


Tuesday, May 7, 2013

Coping with loss

So, we are new to gardening in the Bay Area of California and are literally stumbling through this season trying to figure out what to do. We are so used to Oregon weather and throwing everything in the ground at the slightest hint of spring that we were not properly prepared for the tumultuous and unpredictable weather of our location. There was a sharp spike in the temperature with no rain and we lost several plants who went to seed prematurely.

Please join us in a moment of silence for our fallen plants.

Rainbow Chard- we hardly knew yee


Red Stalked Celery you were too beautiful for this world

Also among those lost were our daikon radishes and our snow peas are producing prematurely at a height of only 2 feet.

But instead of filling the void  on our plates with sadness we are promptly moving on to younger and better looking plants. Added to the fold are green and purple tomatillos , early girl tomatoes, piquillo pimento, orange and red bell peppers.

We are firm believers that if you don't fail you don't learn anything and boy are we learning a lot this year. It truly is an adventure in urban farming.


Saturday, April 13, 2013

The Great Potato Nipple

Today we made some modifications to The Great Potato Experiment. It seems we missed a few small details in our slightly less than careful planning of our potato cage.

It seems obvious to us now, but we weren't getting enough water to the lower layers of taters... so after great debate and discussion we made what I am calling The Potato Nipple & for the record Meghan refuses to refer to it that way.

The problem was that the cage was 3 feet high and we needed water to make it at least 2 feet down so that it would soak the rest of the way down. 4 dollars in PVC pipe & fittings later we had it solved.
Here is how we did it.


The plants toward the top are doing much better than the one toward the bottom. So we wet the soil and hammered a 1 inch schedule 40 piece of PVC down the middle of the cage to create a cavity.

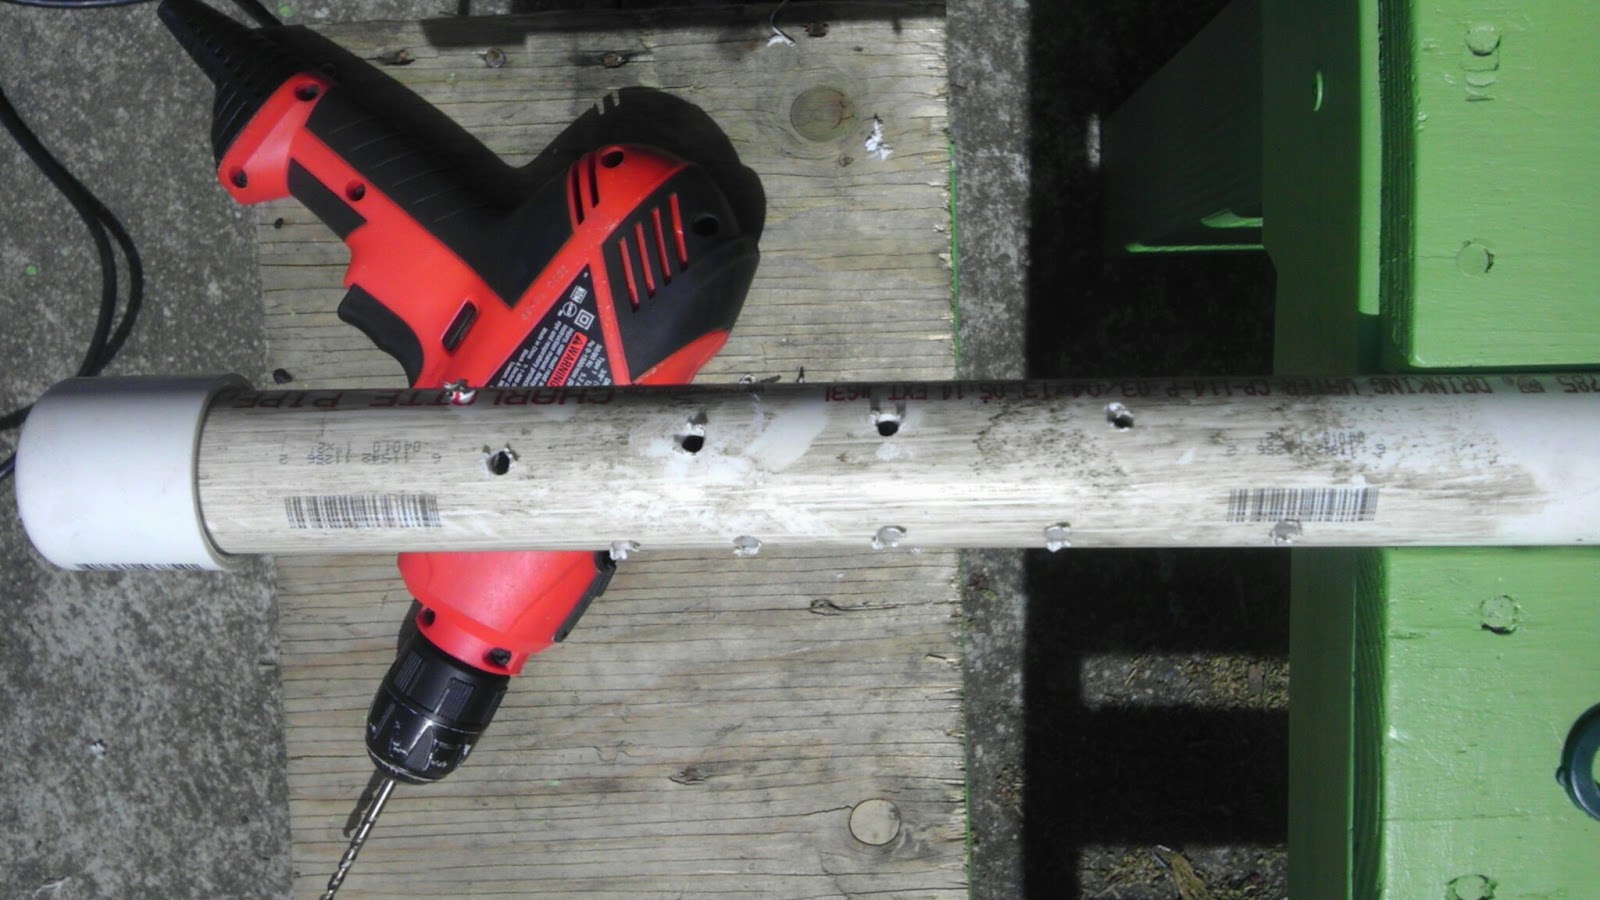
Once the wet soil had settled ( about 3 hours ) we pulled the pipe out & drilled several ( alot ! ) of 3/16 holes in the lover half of the pipe, put a cap on one end and a 1 inch couple on the other ( for stability )


We reinserted the pipe into the cavity ( holes drilled & cap on ) and put an inverted bottle on top filled with water ( not whiskey ) to create a slow drip system.

Happy Taters 

All of that being said, what we should have done is put a perforated pipe down the center of the cage when we initially planted, designated a hose ( or similar re-purposed drip system ) for watering. Either way we are still looking at a harvest of over 100 potatoes on a footprint of less than 3 feet. We got to be creative on an already creative idea and we are going to yield a lot of food.


Tuesday, April 9, 2013

Chard Wars

It's a beautiful day in the bay area. 73 degrees Fahrenheit, sunny and nothing to do in the garden but water and watch everything grow.

Or.... be silly and stage the many battles of the epic sci-fi series Chard Wars 


Battle of Strawberry Buds

The Empire invasion of Carrots 

Radish Troopers are done looking for droids


The Epic Chard Wars. 
patent pending :) 


Saturday, March 30, 2013

March Update

I've decided to do a monthly update in addition to our regular posts. It's almost impossible to tell you everything that we have going on here... but I'm going to try anyway.

First, some very exciting news. Our potato experiment appears to be working !


There is also a number of sprouts coming out of the side of the cage as we hoped. It's very exciting. It took 16 days from planting our potato cuts to seeing growth breaking through to bask in the sun. We are very proud of our tiny tubers. 

Generally all around the garden we are seeing a lot of progress. Little green folks popping up all over the place. 

Look at all our little green friends !

We also picked and ate our first radish. 

The peas are starting to grab their trellis. 

Strawberries are doing great in their gutter.

This poppy should be in full bloom any minute now. 

And just for fun here is a list of everything we are growing.

  1. Radish
  2. Red Stalked Celery
  3. Purple Broccoli
  4. Carrot
  5. Parsnip
  6. Rainbow Chard
  7. Chioggia Beets
  8. Golden Beets
  9. Sugar Snaps
  10. Shell Peas
  11. Basil
  12. Chive
  13. Tulsy Basil
  14. Chamomile
  15. Oregano
  16. Cat Nip
  17. Mint
  18. Butter Lettuce
  19. Spinach
  20. Oak Heart Lettuce
  21. Arugula
  22. Bok Choy
  23. Daikon
  24. Russet Potato
  25. Butter Potato
  26. Red Potato
  27. Red Cabbage
It's been a fun,exciting and challenging month at The Littlest Farm with so much more to come in April.


Tuesday, February 26, 2013

In the gutter

It has been a busy couple of weeks here at The Littlest Farm... busy enough that we haven't had time to post but here are the latest updates and a quick instructional.

Let the updates begin!

Our starts have started.

It has only been a couple of weeks and we have all of our herb and ( bee attracting ) flowers poking their heads out.


Meg picked up a straw bale from a local horse farm for only eight dollars and built a planter box for it. 
Carrots were promptly planted.


There is also purple broccoli and red stemmed celery getting started in another set of beds.  


This posts instructional is a great space saver for folks with little room for growing. 

Gutters!

I purchased a ten foot section of vinyl gutter and cut in into two five foot pieces and using some masonry screws mounted it above our raised beds giving us a new space to plant our pick-able lettuces. 

First cap off the ends.

Drill some holes for drainage.

Mount brackets
I spaced them at 2 inches, 30 inches and 58 inches for a 60 inch section.

Insert gutter
I will be adding roughly 10% vermiculite to the soil for water retention.


Tuesday, February 12, 2013

Re-using + Re-purposing = Awesome


I had my first day off in a while today and decided to make a concentrated effort in reducing our pile of "scrap" wood. If you have been following The Littlest Farm you know that we make use of discarded pallets for most of our projects. When you use pallets you end up with seemingly useless scraps. My goal today was to use the useless. I think I did an okay job...

The scrap pile

My first idea was to add to the table we had built earlier in the week. So I threw together a condiment box for our many BBQ's.


Yes, that table is made from a pallet. 90% of what we build is made from pallets... why are you surprised?
I had some 2x4's laying around and so after the box I started making benches. I wanted to make chairs but frankly I'm not that gifted a carpenter. 

Kilgore approved

Squirrel approved

Now we have a complete outdoor dining area. Table, seats... squirrel people and cheap beer. By the time it's BBQ season here this is going to be one awesome garden. 


Tuesday, January 15, 2013

Spring is coming

With spring just around the corner ( some of us closer to the corner than others ) some preparations need to be made. For us, the chief among them is getting our sees started. In a previous post we talked about the mini-greenhouses that we germinate in and briefly mentioned the origami boxes we make for each future plant to start in. Here is how to make those boxes.

We start by cutting up a paper bag into 7 x 7 inch squares ( giving us about 10 squares per bag ). 


Then the folding begins. 
Fold the square twice into a triangle.
Unfold your creased triangle
and turn the corners in.

Fold into thirds lengthwise

Crease and again unfold.


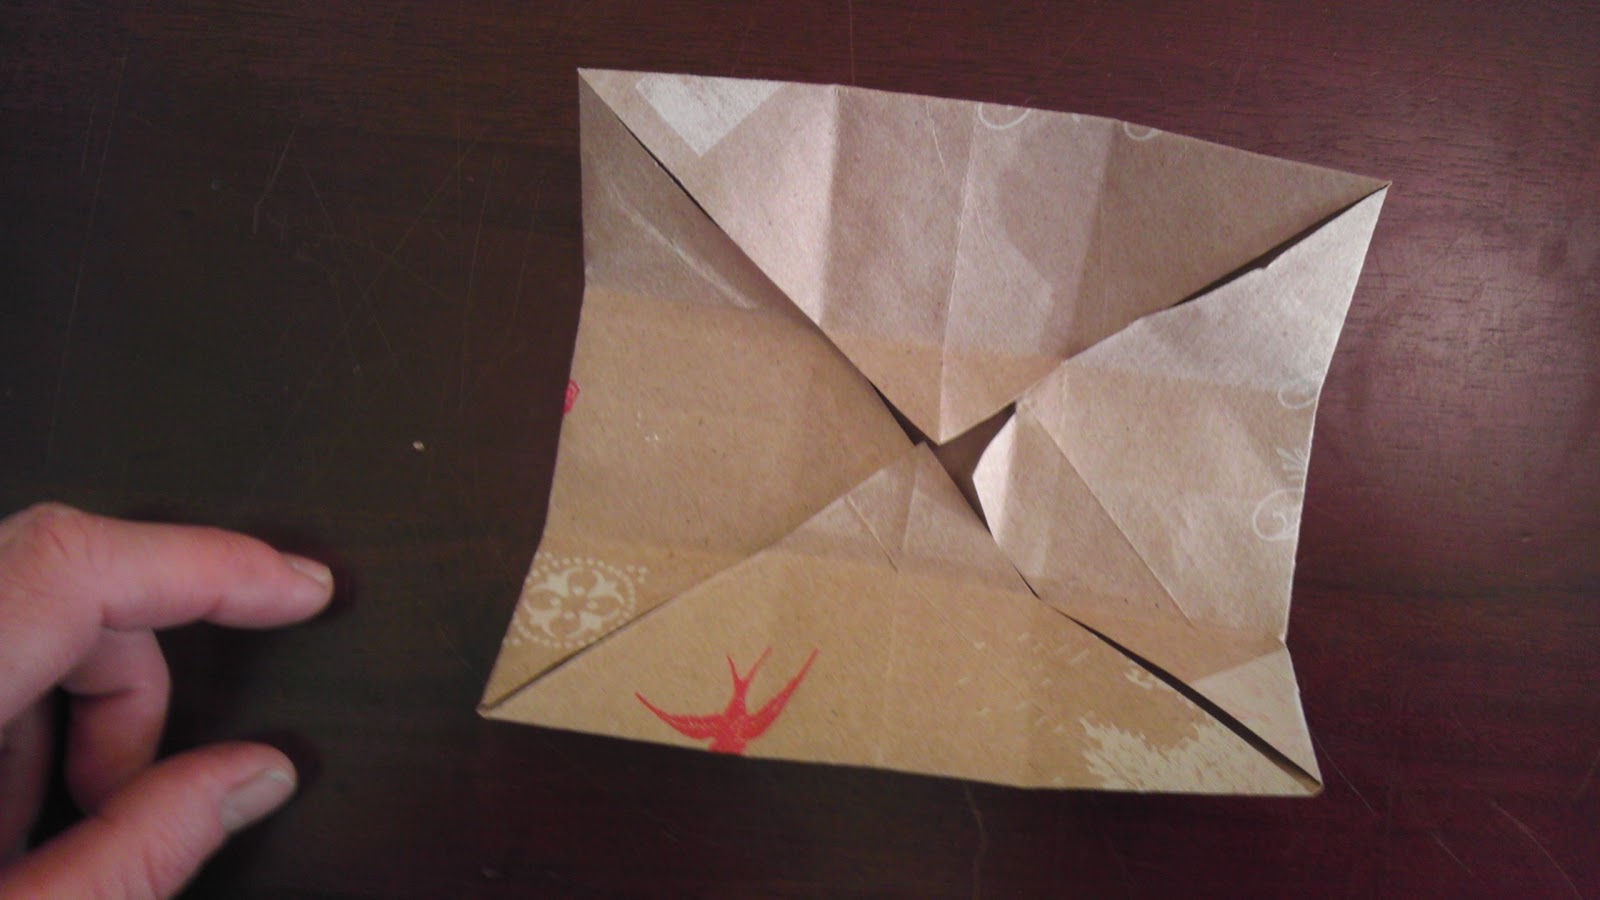
Fold in the corners
Fold up the two sides of the 1/3 fold and 
tuck in the ends.

Tuck in the other end.
There you go !
A 1 3/4 square box perfect for starting seeds indoor or outdoor.