Showing posts with label build. Show all posts

Tuesday, June 18, 2013

Pallet Table (a.k.a. palatable)

I apologize for the poor pun / word play of the table. I assure you that this is a serious post about making a table from a pallet and will involve no shenanigans or squirrels drinking beer.


In the beginning there was a pallet & no where to sit. 

Nowhere to enjoy a meal.

Nowhere to pry the fruit of its pit.

Only bad poems written with zeal. 


This table was built in the background over a couple of months, you may have (literately) noticed in the background in photos since we began. 

We started with a pallet, a pry bar and an idea. This is our idea of re-purposing.  

It turned out one 4x4 wouldn't hold up the table.

We added 3 more

The last two pictures have our benches in the background :) ...

We built them so the squirrel had somewhere to drink his beer

A wee bit of paint...

Some found foam and purchased vinyl 


Come on over... let's have a BBQ


Tuesday, May 28, 2013

Cool ( as a ) cucumber thing.


In yet another effort to use everything that we can get our hands on Meg grabbed some plum branches that were being pruned. The idea is to strip them of their bark, sink them into one of our raised beds, lash them together at the top with the stripped bark and use them for our cucumbers to vine.

Here is how she did it.

You will need:
  • branches of a sapling
  • a knife
  • bucket filled with water
  • pruning shears


First trim back all of the leafy branches leaving the strong main branch.
Hold onto those smaller branches though. You will need them.

After scoring the length of the branch peel back the bark

Soak bark for 15 to 20 minutes

Choose your location for the tripod


Using the soaked bark lash the tops together

Using the smaller branches begin your trellis. Lashing 
sets of branches using bark. 

Plant your cukes...

...stand back and admire. 

All in all the the project took around an hour and was fairly simple to do.  Plus, it looks really cool in the garden. 


Saturday, April 13, 2013

The Great Potato Nipple

Today we made some modifications to The Great Potato Experiment. It seems we missed a few small details in our slightly less than careful planning of our potato cage.

It seems obvious to us now, but we weren't getting enough water to the lower layers of taters... so after great debate and discussion we made what I am calling The Potato Nipple & for the record Meghan refuses to refer to it that way.

The problem was that the cage was 3 feet high and we needed water to make it at least 2 feet down so that it would soak the rest of the way down. 4 dollars in PVC pipe & fittings later we had it solved.
Here is how we did it.


The plants toward the top are doing much better than the one toward the bottom. So we wet the soil and hammered a 1 inch schedule 40 piece of PVC down the middle of the cage to create a cavity.

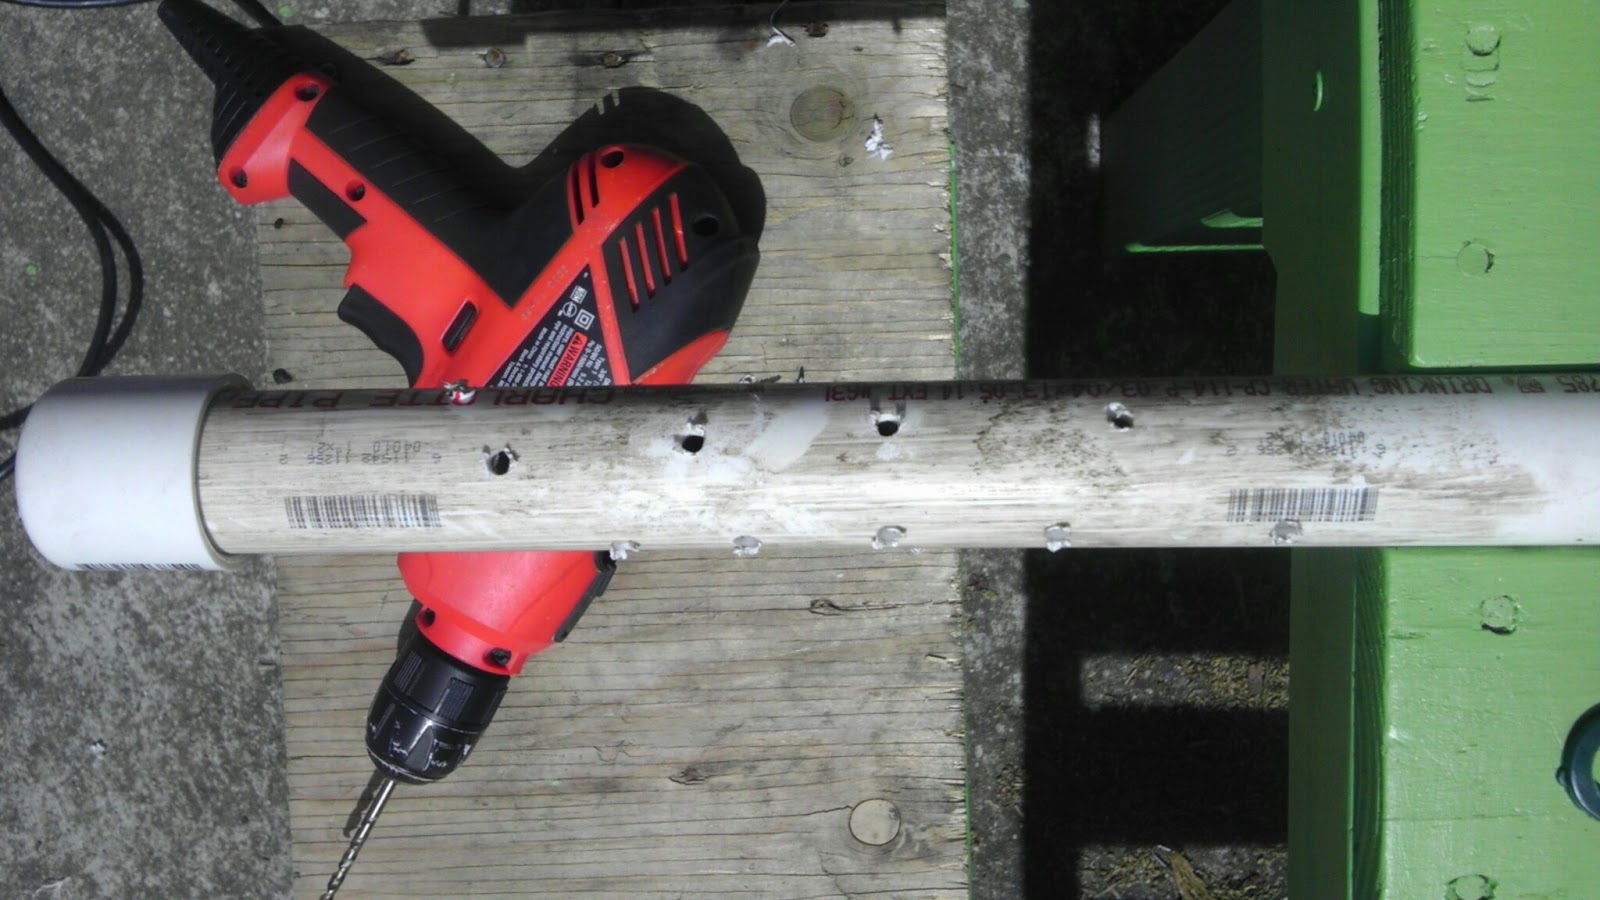
Once the wet soil had settled ( about 3 hours ) we pulled the pipe out & drilled several ( alot ! ) of 3/16 holes in the lover half of the pipe, put a cap on one end and a 1 inch couple on the other ( for stability )


We reinserted the pipe into the cavity ( holes drilled & cap on ) and put an inverted bottle on top filled with water ( not whiskey ) to create a slow drip system.

Happy Taters 

All of that being said, what we should have done is put a perforated pipe down the center of the cage when we initially planted, designated a hose ( or similar re-purposed drip system ) for watering. Either way we are still looking at a harvest of over 100 potatoes on a footprint of less than 3 feet. We got to be creative on an already creative idea and we are going to yield a lot of food.


Sunday, April 7, 2013

Building a raised bed

It occurred to me today while helping a customer at the hardware store that not everyone knows how to build a raised bed... much less no how to plan what to put in it. So, starting today +The Littlest Farm  will be putting more effort into sharing the basics to help people get started growing.


This is a pretty solid tutorial. 


Never forget that the internet is a never ending source of plans. My personal favorite is Popular Mechanics. Their raised bed plans are unrivaled. 

Happy Growing! 


Thursday, March 14, 2013

The Great Potato Experiment

Over the winter as we planned our garden we often modified our ideas through several versions until we agreed on the best way to build or layout whatever was on the docket that day. Nothing was more debated or went through more evolution than our potato plan.

We love potatoes and eat them all the time so obviously we wanted them in the garden but there are so any different growing mediums out there that we couldn't decide which one was for us.

Since our first priority in all projects is to re-purpose and reuse otherwise useless materials our initial inclination was to use old car tires stacked to contain our spuds.


We read about this idea in a great book The Urban Homestead. This book is full of great tips and ideas but ultimately we didn't choose this method because of fears of what might leech from the tires into our soil. This fear might not be completely founded but regardless was a concern for us. 

The second idea that we considered was to just put them in their own raised bed and grow them one plant at a time. An idea that obviously as worked just fine for a few million years but that doesn't mean it is good enough for us. 


The trouble with this age old method of tater production is that it just didn't seem efficient enough to us. We love the idea of the tires and stacking up plant on top of plant and really wanted that increased yield without the side effects. 

And that is when my wife had a brilliant idea. 

The TUBER CAGE!!


The plan was to take a six foot long section of hardware cloth or welded wire that was three feet tall, pull it into a circle three feet in diameter ( had to use pi to figure that one out , Happy Pi day! ) and fill it with layer after layer of potatoes and that is what we did. 
Check out the pics of the process and we will keep posted as to their progress. 

The spudded potatoes

The hope is the plants will grow out the side toward the sun

Cross your fingers. 


Click HERE for an update on our experiment. 

Tuesday, February 12, 2013

Re-using + Re-purposing = Awesome


I had my first day off in a while today and decided to make a concentrated effort in reducing our pile of "scrap" wood. If you have been following The Littlest Farm you know that we make use of discarded pallets for most of our projects. When you use pallets you end up with seemingly useless scraps. My goal today was to use the useless. I think I did an okay job...

The scrap pile

My first idea was to add to the table we had built earlier in the week. So I threw together a condiment box for our many BBQ's.


Yes, that table is made from a pallet. 90% of what we build is made from pallets... why are you surprised?
I had some 2x4's laying around and so after the box I started making benches. I wanted to make chairs but frankly I'm not that gifted a carpenter. 

Kilgore approved

Squirrel approved

Now we have a complete outdoor dining area. Table, seats... squirrel people and cheap beer. By the time it's BBQ season here this is going to be one awesome garden. 


Thursday, January 17, 2013

Bean Teepee

We are hoping to build a bean tee-pee to go along with our early planting in February. If you have never had a bean tee-pee they are fun to build, have and eat. You create a great growing area for runner beans and end up with a neat little edible fort and who doesn't love a fort. I might be a technical adult but there is a child inside of me that gets all worked up at the idea of having a fort in the yard.

                                                         photo credit http://lillbutton2.blogspot.com/


Anyway, after a little bit of reading I have seen just how easy it can be to build a bean tee-pee. All you really need is bean seeds or starts, 6 to 8 bamboo or wooden poles each about 6 feet tall and a little wire to bind the whole thing together.
Clear a nice level spot that gets a lot of sun.The size of the circle will vary on the height of the poles ( use your best judgement here ). Once you have your circle set up begin putting out your poles at equal distances around the circle being sure to leave a large enough space in the front to get inside the tee-pee.
Sink each pole about six inches into the soil and lash them together at the top. If it doesn't seem very stable set up support wires horizontally every 2 feet or so ( again being sure to leave yourself room to get inside the tee-pee ).


Once you are set up plant 4 or 5 bean plants per upright and watch it grow.
It is important to ( once your plants have grown ) to harvest inside as much as on the outside to keep your proud structure/fort/trellis from collapsing. 

Enjoy! 


Tuesday, January 15, 2013

Spring is coming

With spring just around the corner ( some of us closer to the corner than others ) some preparations need to be made. For us, the chief among them is getting our sees started. In a previous post we talked about the mini-greenhouses that we germinate in and briefly mentioned the origami boxes we make for each future plant to start in. Here is how to make those boxes.

We start by cutting up a paper bag into 7 x 7 inch squares ( giving us about 10 squares per bag ). 


Then the folding begins. 
Fold the square twice into a triangle.
Unfold your creased triangle
and turn the corners in.

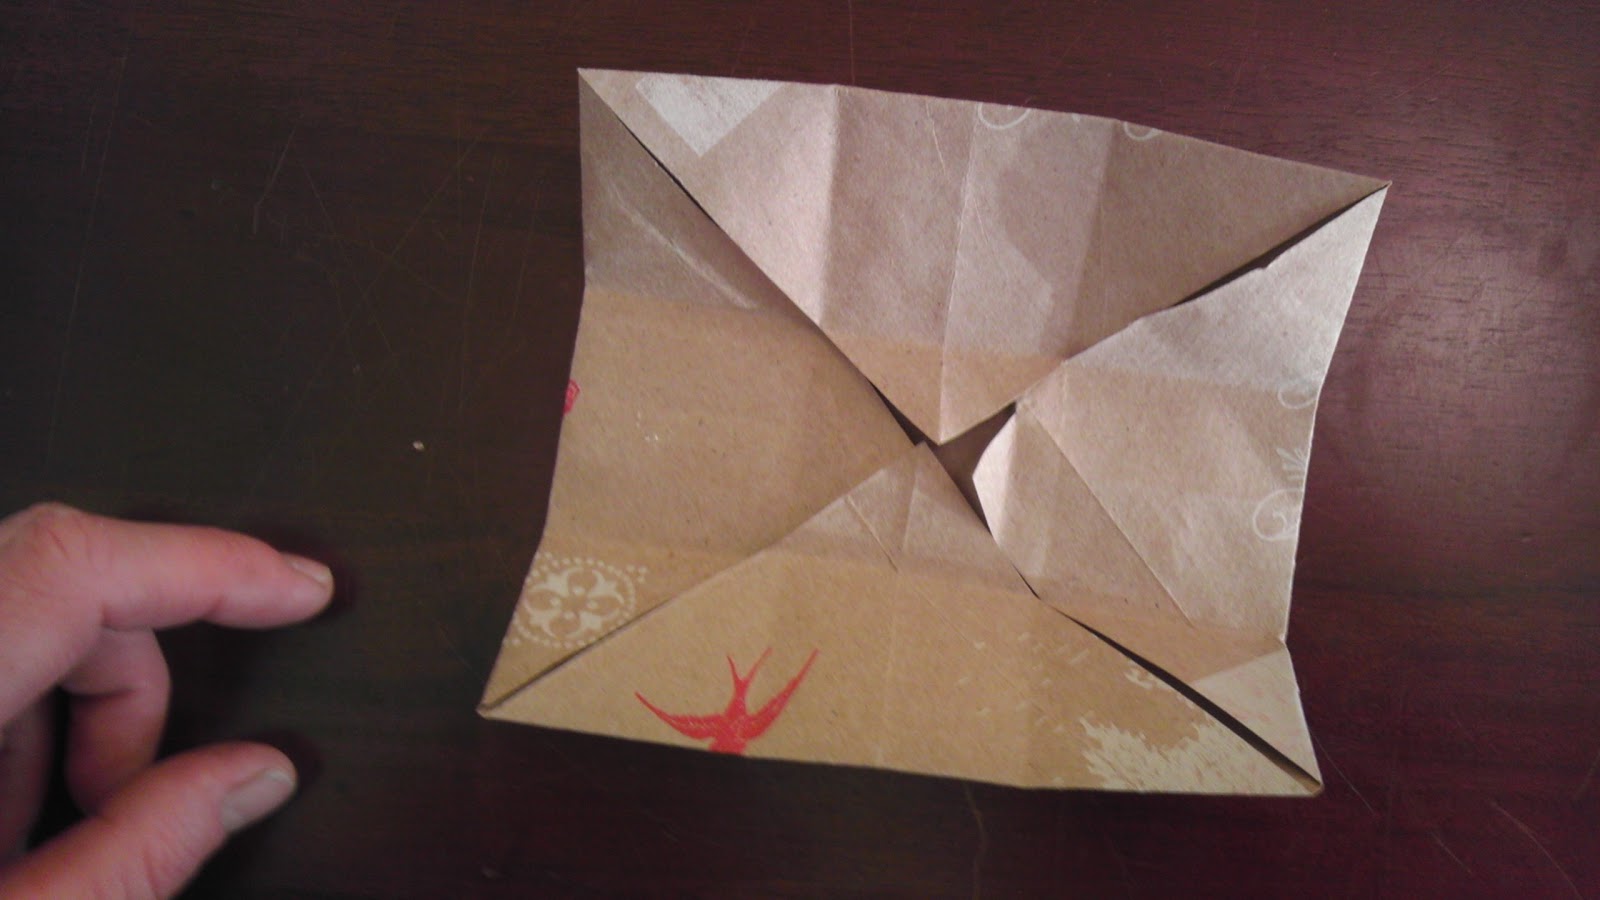
Fold into thirds lengthwise

Crease and again unfold.


Fold in the corners
Fold up the two sides of the 1/3 fold and 
tuck in the ends.

Tuck in the other end.
There you go !
A 1 3/4 square box perfect for starting seeds indoor or outdoor.